Here's a short review of some of the basic knots we will be covering in our upcoming book! We will be going much more in depth with these knotting techniques later, but this will help get you started!
 Overhand Knot
The golden overhand knot! This is your basic knot. It's great for tying in between beads and holding them securely on a cord or use it to finish off the cord. It can be tied with one or more cords. It can be functional as well as decorative!

The golden overhand knot! This is your basic knot. It's great for tying in between beads and holding them securely on a cord or use it to finish off the cord. It can be tied with one or more cords. It can be functional as well as decorative!
Make a loop. Pass the cord behind the loop and then through the loop. Pull tight.

Square Knot
This knot is great for tying two cords together and finishing off cords too.
Pass the right cord over the left cord and through the loop. Pull tight. Pass the left cord over the right cord and through the loop. Pull tight.
 Lark's Head Knot
This knot is good for attaching cords to pendants, focal pieces or components.
Fold the cord in half. String the folded end of the cord through the hole in the pendant or focal piece. Pass the free ends of the cord through the cord loop. Pull tight.
 Half-Hitch Knot
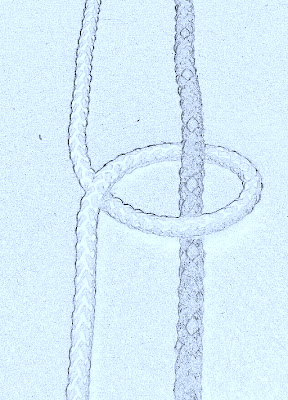
This knot is for binding multiple cords together or to make a loop for a button or bead closure. It's also great for attaching beads to jewelry findings.
Start with an overhand knot or lark's head knot. Make a loop around the cords or finding and pass the cord through the loop. Pull tight.
This knot is great for tying two cords together and finishing off cords too.
Pass the right cord over the left cord and through the loop. Pull tight. Pass the left cord over the right cord and through the loop. Pull tight.

This knot is good for attaching cords to pendants, focal pieces or components.
Fold the cord in half. String the folded end of the cord through the hole in the pendant or focal piece. Pass the free ends of the cord through the cord loop. Pull tight.

This knot is for binding multiple cords together or to make a loop for a button or bead closure. It's also great for attaching beads to jewelry findings.
Start with an overhand knot or lark's head knot. Make a loop around the cords or finding and pass the cord through the loop. Pull tight.